

magento结算页面-添加新的input
《Magento2.X企业级开发实战》
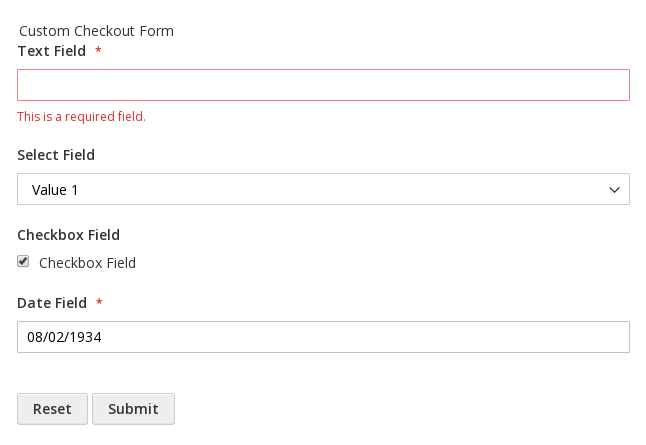
本小节介绍如何向结帐页面添加自定义输入表单(作为 UI 组件实现)。
大多数元素,包括结账页面上的默认表单,都是作为 UI 组件实现的。 我们建议自定义表单是一个 UI 组件,扩展默认的 Magento_Ui/js/form/form 组件。
Magento 提供了向任何结帐步骤添加自定义表单的功能:发货信息、审核和付款信息或自定义。 要添加作为 UI 组件的自定义表单,请执行以下步骤:
- 创建表单 UI 组件的 JS 实现。
- 创建用于呈现表单的knockout.js HTML 模板。
- 在结帐页面布局中声明表单。
为了兼容性、可升级性和易于维护,请不要编辑默认的 Magento 代码。 相反,在单独的模块中添加自定义。 为了正确应用结帐自定义,自定义模块应依赖于 Magento_Checkout 模块。
不要使用 Ui 作为自定义模块名称,因为指定路径时所需的 %Vendor%_Ui 表示法可能会导致问题。
第一步:创建表单UI组件的JS实现
在 <your_module_dir>/view/frontend/web/js/view/ 目录中,创建一个实现表单的 custom-checkout-form.js 文件。
js文件示例:
/*global define*/
define([
    'Magento_Ui/js/form/form'
], function(Component) {
    'use strict';
    return Component.extend({
        initialize: function () {
            this._super();
            // component initialization logic
            return this;
        },

        /**
         * Form submit handler
         *
         * This method can have any name.
         */
        onSubmit: function() {
            // trigger form validation
            this.source.set('params.invalid', false);
            this.source.trigger('customCheckoutForm.data.validate');

            // verify that form data is valid
            if (!this.source.get('params.invalid')) {
                // data is retrieved from data provider by value of the customScope property
                var formData = this.source.get('customCheckoutForm');
                // do something with form data
                console.dir(formData);
            }
        }
    });
});
第 2 步:创建 HTML 模板
在名为 custom-checkout-form.html 的 <your_module_dir>/view/frontend/web/template 目录下为表单组件添加 Knockout.js HTML 模板。
示例代码:
<div>
    <form id="custom-checkout-form" class="form" data-bind="attr: {'data-hasrequired': $t('* Required Fields')}">
        <fieldset class="fieldset">
            <legend data-bind="i18n: 'Custom Checkout Form'"></legend>
            <!-- ko foreach: getRegion('custom-checkout-form-fields') -->
            <!-- ko template: getTemplate() --><!-- /ko -->
            <!--/ko-->
        </fieldset>
        <button type="reset">
            <span data-bind="i18n: 'Reset'"></span>
        </button>
        <button type="button" data-bind="click: onSubmit" class="action">
            <span data-bind="i18n: 'Submit'"></span>
        </button>
    </form>
</div>
第 3 步:在结帐页面布局中声明表单
某些默认结帐模板声明可以插入附加内容的区域。 可以在这些区域中的任何一个中添加自定义表单。 这些区域在默认 Checkout 页面布局文件 <Checkout_module_dir>/view/frontend/layout/checkout_index_index.xml中提供了相应的注释。
还可以在此布局文件中使用的块的 .html 模板中找到区域。 例如,shipping JS 组件(参见 <Magento_Checkout_module_dir>/view/frontend/web/template/shipping.html)提供了表单之前的区域和相应的 UI 容器。
此处添加的任何内容都在“送货信息”步骤中的“送货地址”表单之前呈现。 要向该区域添加内容,请在 <your_module_dir>/view/frontend/layout/中创建 checkout_index_index.xml 布局文件。
代码示例:
<?xml version="1.0"?>
<page xmlns:xsi="http://www.w3.org/2001/XMLSchema-instance" xsi:noNamespaceSchemaLocation="urn:magento:framework:View/Layout/etc/page_configuration.xsd">
    <body>
        <referenceBlock name="checkout.root">
            <arguments>
                <argument name="jsLayout" xsi:type="array">
                    <item name="components" xsi:type="array">
                        <item name="checkout" xsi:type="array">
                            <item name="children" xsi:type="array">
                                <item name="steps" xsi:type="array">
                                    <item name="children" xsi:type="array">
                                        <item name="shipping-step" xsi:type="array">
                                            <item name="children" xsi:type="array">
                                                <item name="shippingAddress" xsi:type="array">
                                                    <item name="children" xsi:type="array">
                                                        <item name="before-form" xsi:type="array">
                                                            <item name="children" xsi:type="array">
                                                                <item name="custom-checkout-form-container" xsi:type="array">
                                                                    <!-- Add this item to configure your js file  -->
                                                                    <item name="component" xsi:type="string">VendorName_ModuleName/js/view/custom-checkout-form</item>
                                                                    <item name="config" xsi:type="array">
                                                                        <!-- And this to add your html template  -->
                                                                        <item name="template" xsi:type="string">VendorName_ModuleName/custom-checkout-form</item>
                                                                    </item>
                                                                    <item name="children" xsi:type="array">
                                                                        <!-- Here we will add the form fields  -->
                                                                    </item>
                                                                </item>
                                                            </item>
                                                        </item>
                                                    </item>
                                                </item>
                                            </item>
                                        </item>
                                    </item>
                                </item>
                            </item>
                        </item>
                    </item>
                </argument>
            </arguments>
        </referenceBlock>
    </body>
</page>
最后,清除缓存:
php bin/magento s:up
chmod -R 777 /var/www/html/magento本文来源于:【Magento中文网】,并添加本文地址链接。
如未按上述操作复制或转载,本站有权追究法律责任。
若本站内容侵犯了原著者的合法权益,可联系我们进行处理。