

Magento 2 向Catalog或Customer添加自定义 EAV 属性
7天成为Magento系统架构师,现在开始学习Magento全栈开发!
《Magento2.X企业级开发实战》
EAV属性示意图
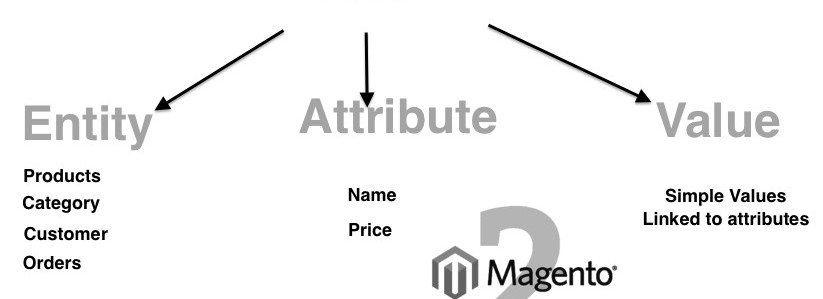
Magento 2 中的 EAV 系统与 Magento 1 几乎相似,但许多功能和技术发生了变化,在本教程中,我们将提供 2 个示例,说明如何将自定义 eav 属性添加到类别或客户。
1 – 为类别创建自定义属性:
在您的模型并创建 Setup 文件夹,在其中创建文件 InstallData.php 并添加此完整代码:
<?php
/**
 * Copyright © 2015 Magento. All rights reserved.
 * See COPYING.txt for license details.
 */
namespace Ibnab\CustomAttribute\Setup;
use Magento\Framework\Module\Setup\Migration;
use Magento\Framework\Setup\InstallDataInterface;
use Magento\Framework\Setup\ModuleContextInterface;
use Magento\Framework\Setup\ModuleDataSetupInterface;
use Magento\Catalog\Setup\CategorySetupFactory;

/**
 * @codeCoverageIgnore
 */
class InstallData implements InstallDataInterface
{
    /**
     * Category setup factory
     *
     * @var CategorySetupFactory
     */
    private $categorySetupFactory;

    /**
     * Init
     *
     * @param CategorySetupFactory $categorySetupFactory
     */
    public function __construct(CategorySetupFactory $categorySetupFactory)
    {
        $this->categorySetupFactory = $categorySetupFactory;
    }
    /**
     * {@inheritdoc}
     * @SuppressWarnings(PHPMD.ExcessiveMethodLength)
     */
    public function install(ModuleDataSetupInterface $setup, ModuleContextInterface $context)
    {
        $installer = $setup;
         $installer->startSetup();

        $categorySetup = $this->categorySetupFactory->create(['setup' => $setup]);
        $entityTypeId = $categorySetup->getEntityTypeId(\Magento\Catalog\Model\Category::ENTITY);
        $attributeSetId = $categorySetup->getDefaultAttributeSetId($entityTypeId);
         $categorySetup->removeAttribute(
        \Magento\Catalog\Model\Category::ENTITY, 'my_attribute' );
        $categorySetup->addAttribute(
        \Magento\Catalog\Model\Category::ENTITY, 'my_attribute', [
             'type' => 'int',
             'label' => 'My Atrribute ',
             'input' => 'select',
             'source' => 'Magento\Eav\Model\Entity\Attribute\Source\Boolean',
             'required' => false,
             'sort_order' => 100,
             'global' => \Magento\Eav\Model\Entity\Attribute\ScopedAttributeInterface::SCOPE_STORE,
             'group' => 'General Information',
        ]
    );
$installer->endSetup();
    }
}
之后,您需要在模块中的 view/adminhtml/ui_component 中添加 category_form.xml :
<?xml version="1.0" encoding="UTF-8"?>
<!--
/**
 * Copyright © 2016 Magento. All rights reserved.
 * See COPYING.txt for license details.
 */
-->
<form xmlns:xsi="http://www.w3.org/2001/XMLSchema-instance"
      xsi:noNamespaceSchemaLocation="urn:magento:module:Magento_Ui:etc/ui_configuration.xsd">
    <fieldset name="general">
        <field name="my_attribute">
            <argument name="data" xsi:type="array">
            <item name="options" xsi:type="object">Magento\Config\Model\Config\Source\Yesno</item>
                <item name="config" xsi:type="array">
                    <item name="sortOrder" xsi:type="number">60</item>
                    <item name="dataType" xsi:type="string">string</item>
                    <item name="formElement" xsi:type="string">select</item>
                    <item name="label" xsi:type="string" translate="true">My Attribute </item>
                </item>
            </argument>
        </field>
    </fieldset>
</form>
2 – 为客户创建自定义属性:
使用相同的技术到 InstallData.php:
<?php
namespace Ibnab\CustomerPut\Setup;
 use Magento\Framework\Module\Setup\Migration;
use Magento\Framework\Setup\InstallDataInterface;
use Magento\Framework\Setup\ModuleContextInterface;
use Magento\Framework\Setup\ModuleDataSetupInterface;
class InstallData implements InstallDataInterface
{
    /**
     * Customer setup factory
     *
     * @var \Magento\Customer\Setup\CustomerSetupFactory
     */
    private $customerSetupFactory;
    /**
     * Init
     *
     * @param \Magento\Customer\Setup\CustomerSetupFactory $customerSetupFactory
     */
    public function __construct(\Magento\Customer\Setup\CustomerSetupFactory $customerSetupFactory)
    {
        $this->customerSetupFactory = $customerSetupFactory;
    }
    /**
     * Installs DB schema for a module
     *
     * @param ModuleDataSetupInterface $setup
     * @param ModuleContextInterface $context
     * @return void
     */
    public function install(ModuleDataSetupInterface $setup, ModuleContextInterface $context)
    {

        $installer = $setup;
        $installer->startSetup();
        $customerSetup = $this->customerSetupFactory->create(['setup' => $setup]);
        $entityTypeId = $customerSetup->getEntityTypeId(\Magento\Customer\Model\Customer::ENTITY);
        $customerSetup->removeAttribute(\Magento\Customer\Model\Customer::ENTITY, "my_attribute");

        $customerSetup->addAttribute(\Magento\Customer\Model\Customer::ENTITY, "my_attribute",  array(
            "type"     => "varchar",
            "backend"  => "",
            "label"    => "My Attribute",
            "input"    => "text",
            "source"   => "",
            "visible"  => true,
            "required" => true,
            "default" => "",
            "frontend" => "",
            "unique"     => false,
            "note"       => ""

        ));
        $my_attribute   = $customerSetup->getAttribute(\Magento\Customer\Model\Customer::ENTITY, "my_attribute");

        $my_attribute = $customerSetup->getEavConfig()->getAttribute(\Magento\Customer\Model\Customer::ENTITY, ' my_attribute');
        $used_in_forms[]="adminhtml_customer";
        $used_in_forms[]="checkout_register";
        $used_in_forms[]="customer_account_create";
        $used_in_forms[]="customer_account_edit";
        $used_in_forms[]="adminhtml_checkout";
        $my_attribute->setData("used_in_forms", $used_in_forms)
            ->setData("is_used_for_customer_segment", true)
            ->setData("is_system", 0)
            ->setData("is_user_defined", 1)
            ->setData("is_visible", 1)
            ->setData("sort_order", 100);
        $my_attribute->save();
        $installer->endSetup();
    }
}
在这里,我们添加了新代码,我们获得了属性实例:
$my_attribute = $customerSetup->getAttribute(\Magento\Customer\Model\Customer::ENTITY, "my_attribute");我们添加到自定义表单 adminhtml_customer,checkout_register” :
$my_attribute = $customerSetup->getEavConfig()->getAttribute(\Magento\Customer\Model\Customer::ENTITY, ' my_attribute');
        $used_in_forms[]="adminhtml_customer";
        $used_in_forms[]="checkout_register";
        $used_in_forms[]="customer_account_create";
        $used_in_forms[]="customer_account_edit";
        $used_in_forms[]="adminhtml_checkout";
        $my_attribute->setData("used_in_forms", $used_in_forms)
            ->setData("is_used_for_customer_segment", true)
            ->setData("is_system", 0)
            ->setData("is_user_defined", 1)
            ->setData("is_visible", 1)
            ->setData("sort_order", 100);
 $my_attribute->save();
2 – 显示客户的自定义属性:
在我们为 $used_in_forms[]=”adminhtml_customer” 在后端添加了 defaut 的自定义属性 magento 2 显示之后,但在前端您需要一些额外的代码来使用例如我们希望在页面客户注册中显示 ($used_in_forms[]=” customer_account_create”):
首先在你的模块中去或创建 Ibnab/CustomerPut/view/frontend/layout 并创建新的处理程序 xml customer_account_create.xml :
<?xml version="1.0"?>
<page xmlns:xsi="http://www.w3.org/2001/XMLSchema-instance" layout="1column" xsi:noNamespaceSchemaLocation="urn:magento:framework:View/Layout/etc/page_configuration.xsd">
    <body>
        <referenceContainer name="form.additional.info">
            <block class="Magento\Framework\View\Element\Template" name="my_form_additional_info_customer" template="Ibnab_CustomerPut::additionalinfocustomer.phtml"/>
        </referenceContainer>
    </body>
现在在 Ibnab/CustomerPut/view/frontend/templates (additionalinfocustomer.phtml) 中创建 .phtml
 <fieldset class="fieldset create account" data-hasrequired="<?php /* @escapeNotVerified */ echo __('* Required Fields') ?>">
        <legend class="legend"><span><?php /* @escapeNotVerified */ echo __('Additional Information') ?></span></legend><br></p>

<p>        <div class="field my_attribute required">
            <label for="my_attribute" class="label"><span><?php /* @escapeNotVerified */ echo __('My Attribute') ?></span></label>
            <div class="control">
                <input type="text" name="my_attribute" id="my_attribute" title="<?php /* @escapeNotVerified */ echo __('My Attribute') ?>" class="input-text" data-validate="{required:true}" autocomplete="off">
            </div>
        </div>
        </div>
    </fieldset>
以上就是Magento 2 向Catalog或Customer添加自定义 EAV 属性的全部内容
如无特殊说明或标注,任何个人或组织,复制、转载、采集本站内容请注明:
本文来源于:【Magento中文网】,并添加本文地址链接。
如未按上述操作复制或转载,本站有权追究法律责任。
若本站内容侵犯了原著者的合法权益,可联系我们进行处理。
本文来源于:【Magento中文网】,并添加本文地址链接。
如未按上述操作复制或转载,本站有权追究法律责任。
若本站内容侵犯了原著者的合法权益,可联系我们进行处理。